FVector PlayerLocation = GetActorLocation();
float Distance = FVector::Dist(PlayerLocation, LastPosition);
if (Distance > 100.0f)
{
    StepsCounter++;
    printFstring("Steps Taken: %s", *FString::FromInt(StepsCounter));
    LastPosition = PlayerLocation;
    if (StepsCounter == StepsToBattle)
    {
        if (EnemiesKilledArea1 != MaxEnemiesArea1)
        {
            StartBattle();
        }
        else
        {
            SwapToNoEnemiesLeft();
        }
    }
}
This is the logic behind the random encounter system, executed on each event tick.
Every 100 units from the previous position (which we have defined as a single step), it checks whether the number of steps taken matches a random threshold that increases its range each time an encounter occurs.
If the value matches, the function verifies whether there are any enemies remaining in the area.
If there are, a battle begins, if not, a dialogue appears informing the player that there are no enemies left.
This system could be further optimized by avoiding the use of the event tick. Instead, a looping Set Timer by Function could be used to run the same logic every 0.1 seconds, with the timer handle being stopped when needed.
void AMyPlayerCharacter::StartBattle() {
	EncountersNumber += 1;
	GEngine->AddOnScreenDebugMessage(-1, 5.0f, FColor::Red, TEXT("Battle Started"));
	StepsToBattle = FMath::RandRange(10 + EncountersNumber * 10, InitialMaxRandomSteps + FMath::FloorToInt(EncountersNumber * 1.25f));
	StepsCounter = 0;

	PrimaryActorTick.bCanEverTick = false;

	SceneTransition();
}

void AMyPlayerCharacter::SceneTransition() {

	ZoomTransition();
	GetWorld()->GetTimerManager().SetTimer(FadeTimer, this, &AMyPlayerCharacter::ShowFadeWidget, 1.5f, false);
	GetWorld()->GetTimerManager().SetTimer(TransitionTimer, this, &AMyPlayerCharacter::SwapPlayerControl, 2.0f, false);
}

void AMyPlayerCharacter::SwapPlayerControl() {

	APlayerController* PlayerController = Cast(GetController());
	PlayerController->SetViewTarget(FixedCamera);

	FOutputDeviceNull ar;
	const FString command = FString::Printf(TEXT("HandleState"));
	if (BattleManager) {
		BattleManager->CallFunctionByNameWithArguments(*command, ar, NULL, true);

	}
	Camera->SetFieldOfView(InitialFOV);
}
These are the key functions responsible for transitioning to the combat scene, which is managed by a dedicated Battle Manager.
The battle manager is assigned to the player through a trigger box upon entering the level, and it holds references to all the enemies within the designated area.
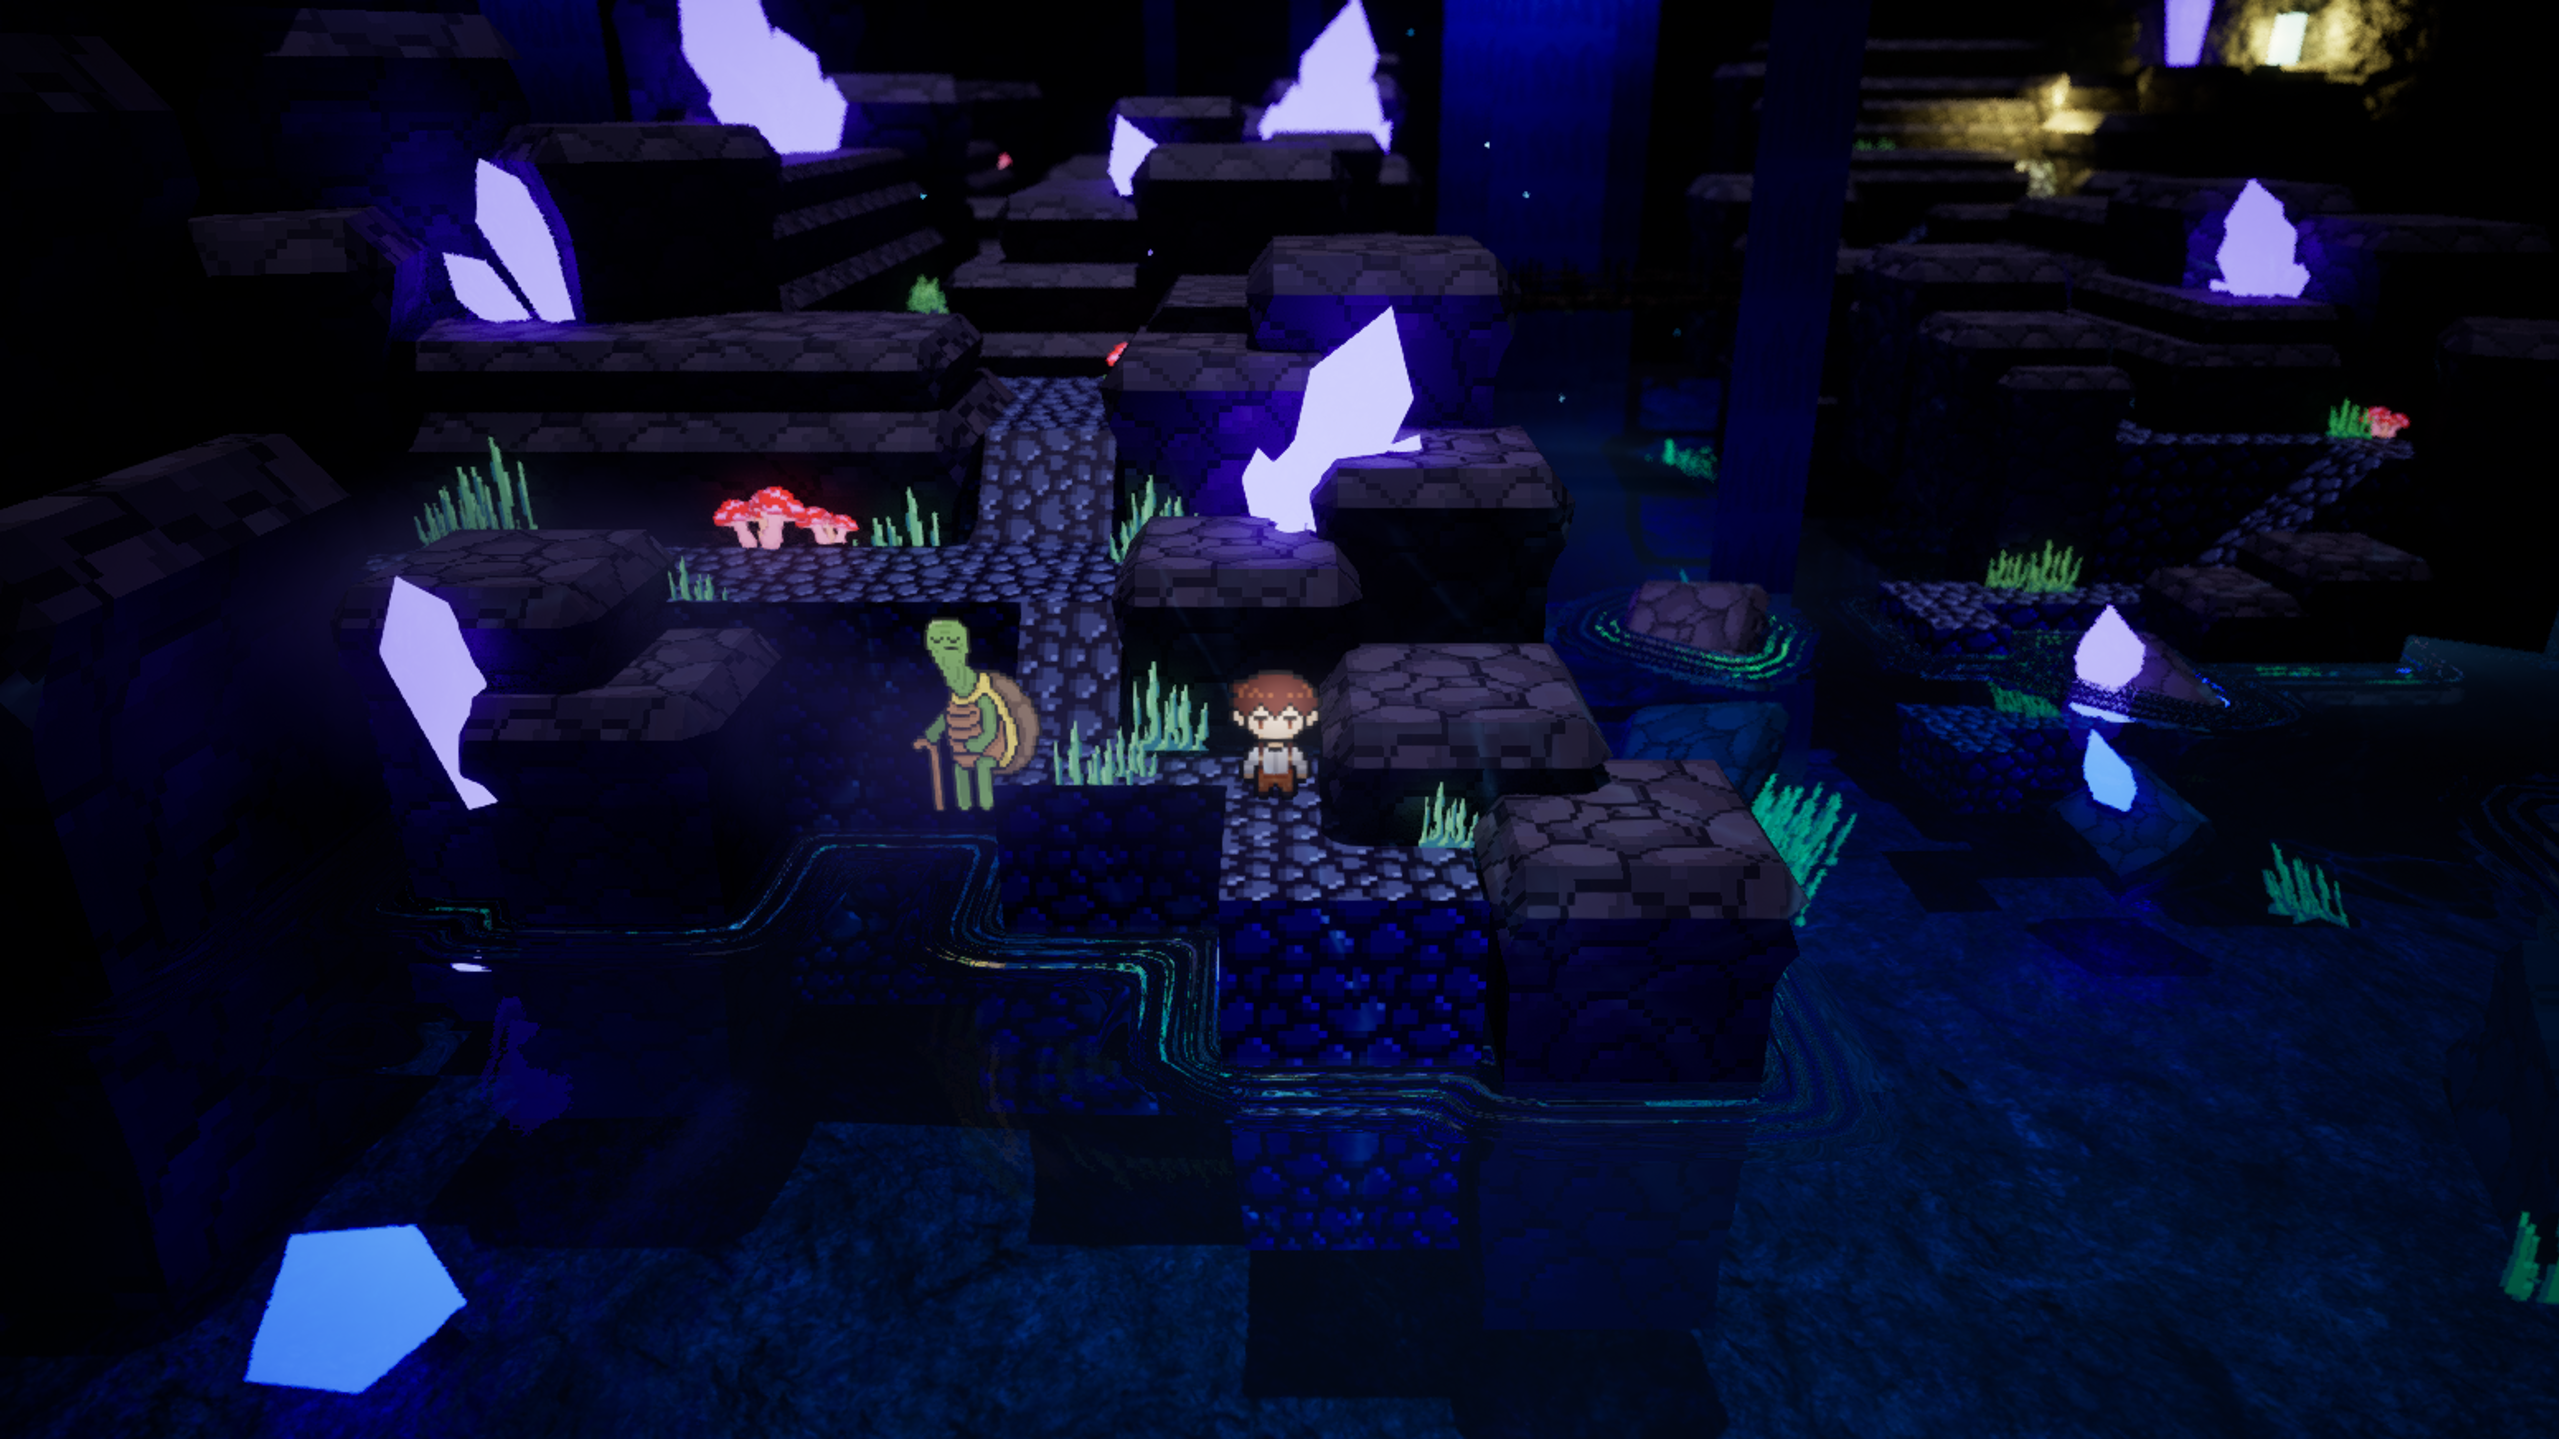
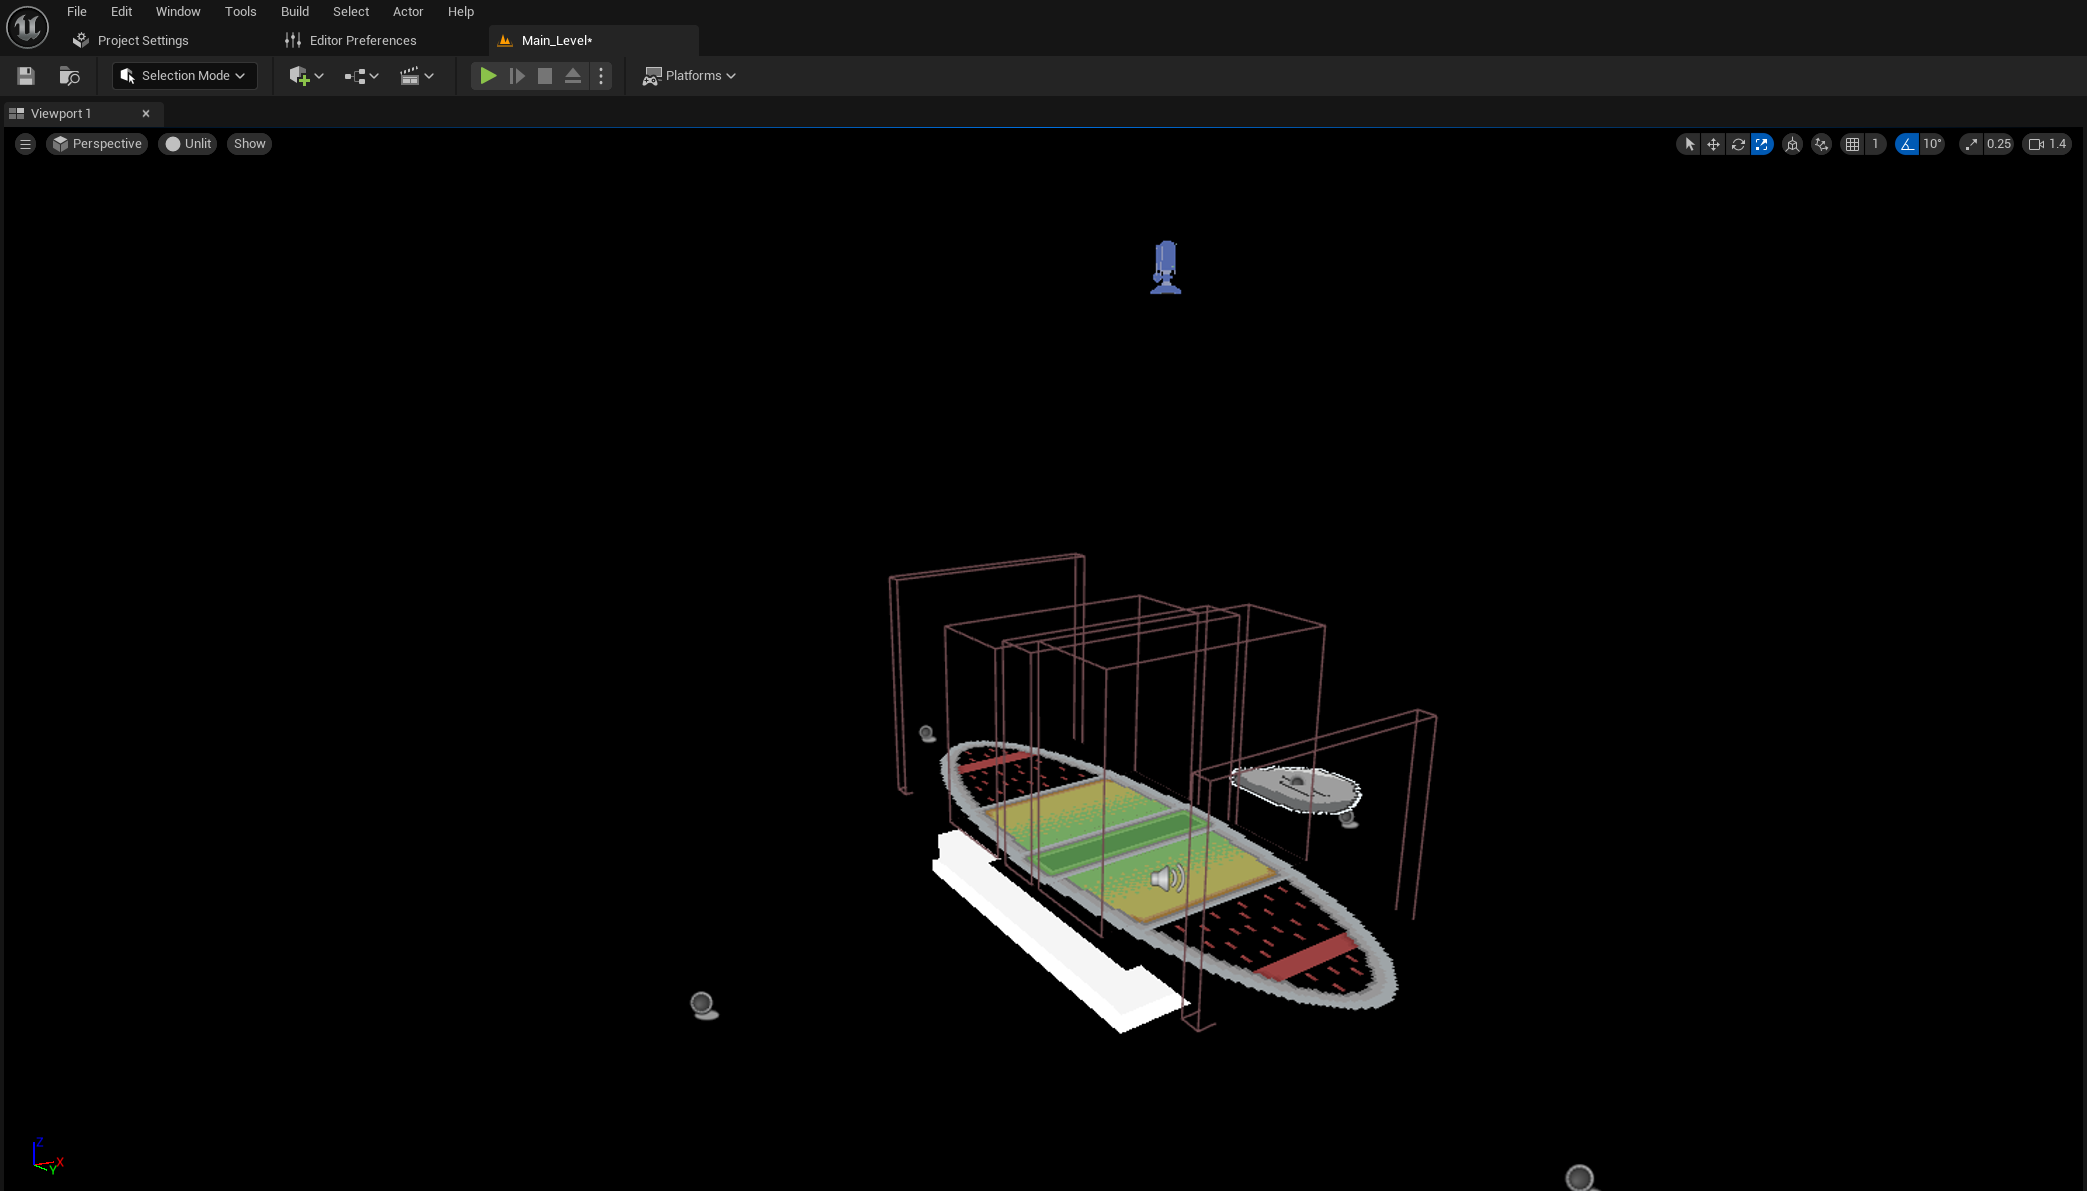
The combat itself is implemented in fake 2D, we simply set active to a fixed camera positioned perpendicularly to the plane on which the player heart moves.

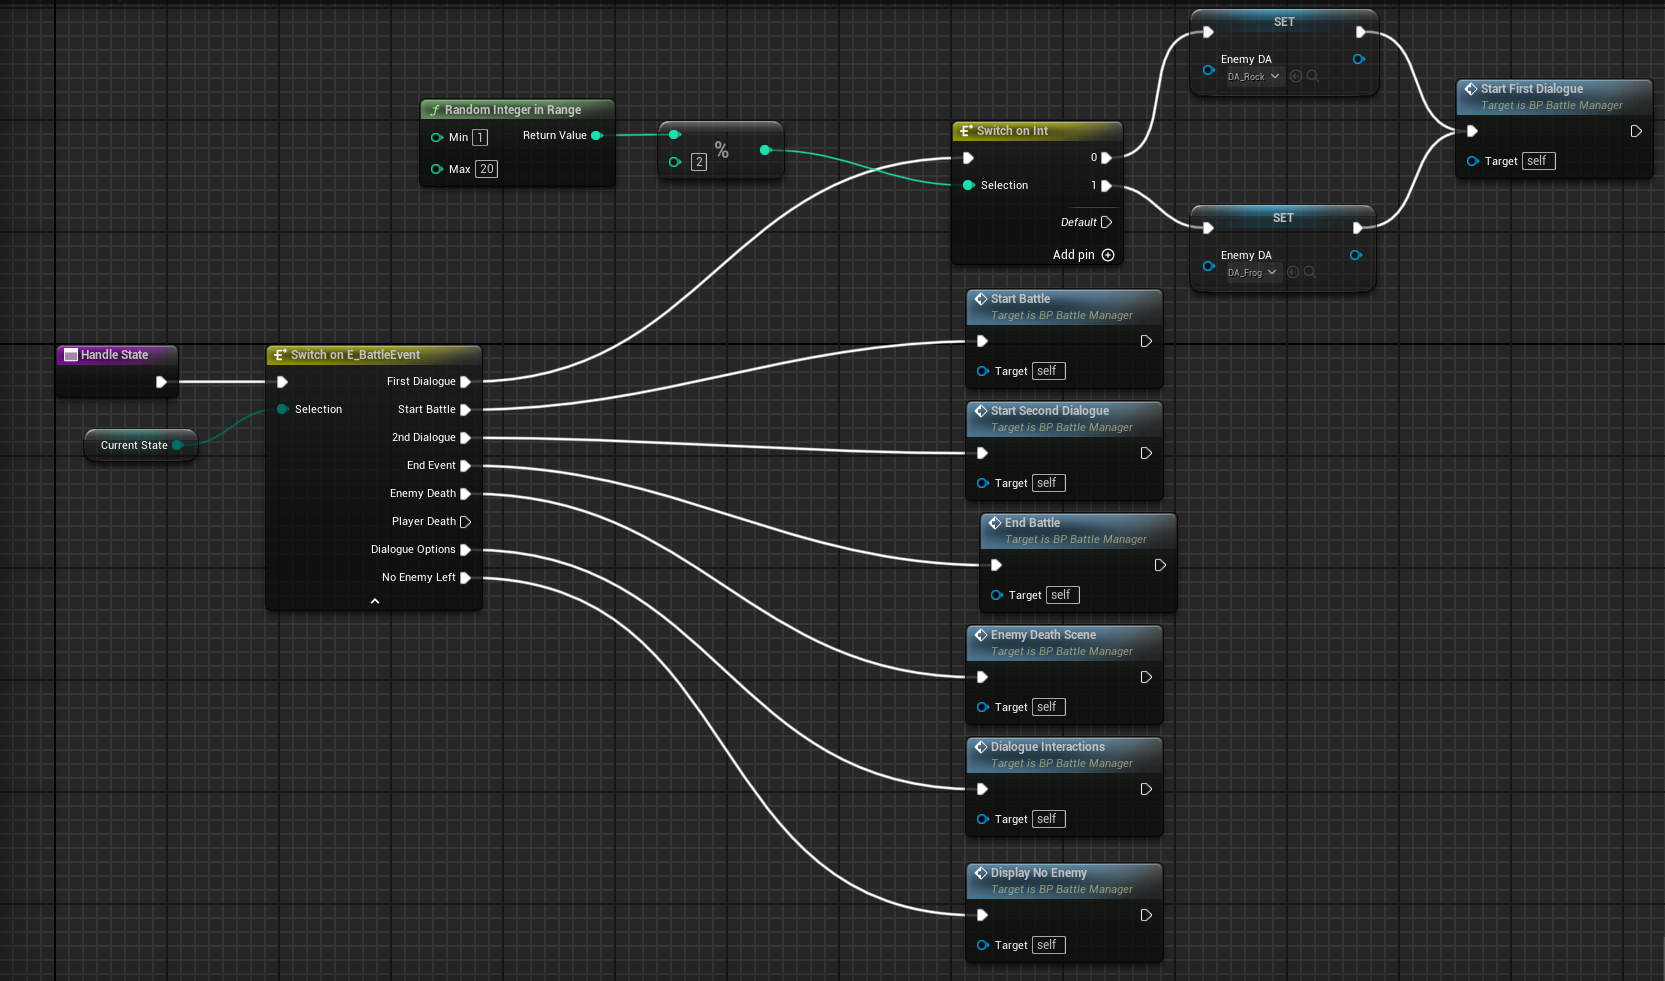
Example of a state function
Start battle function
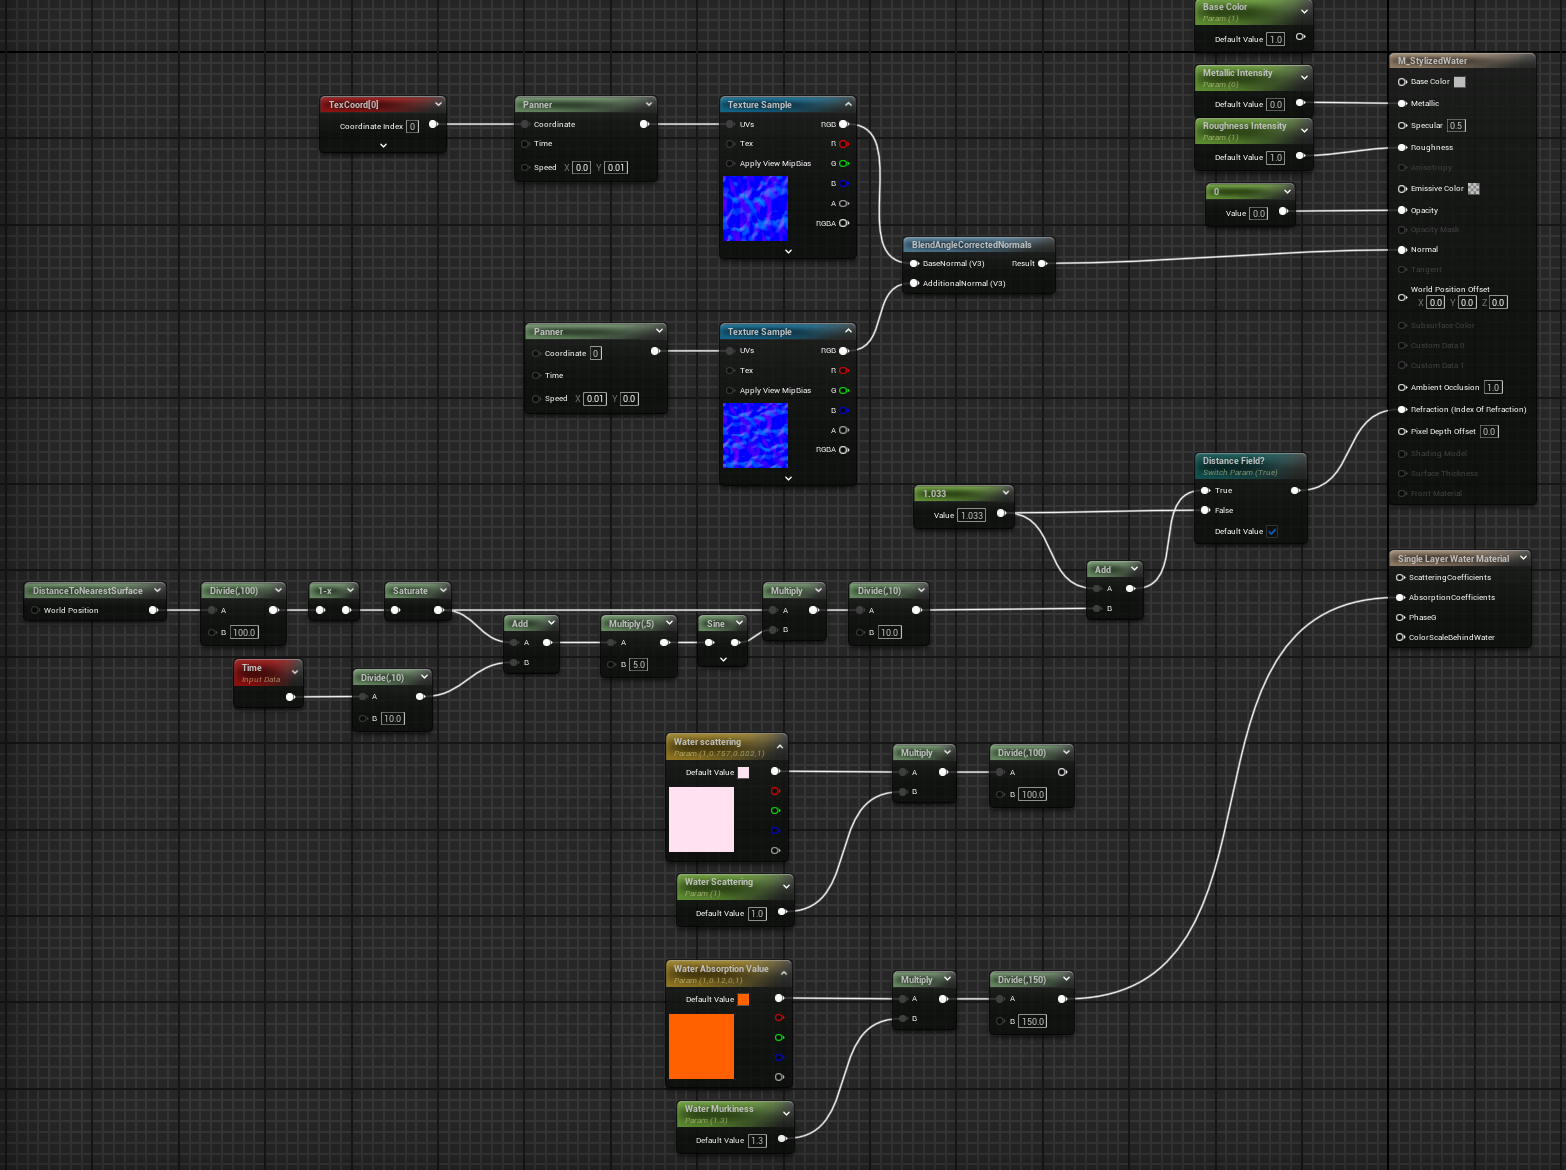
A look inside the battle scene
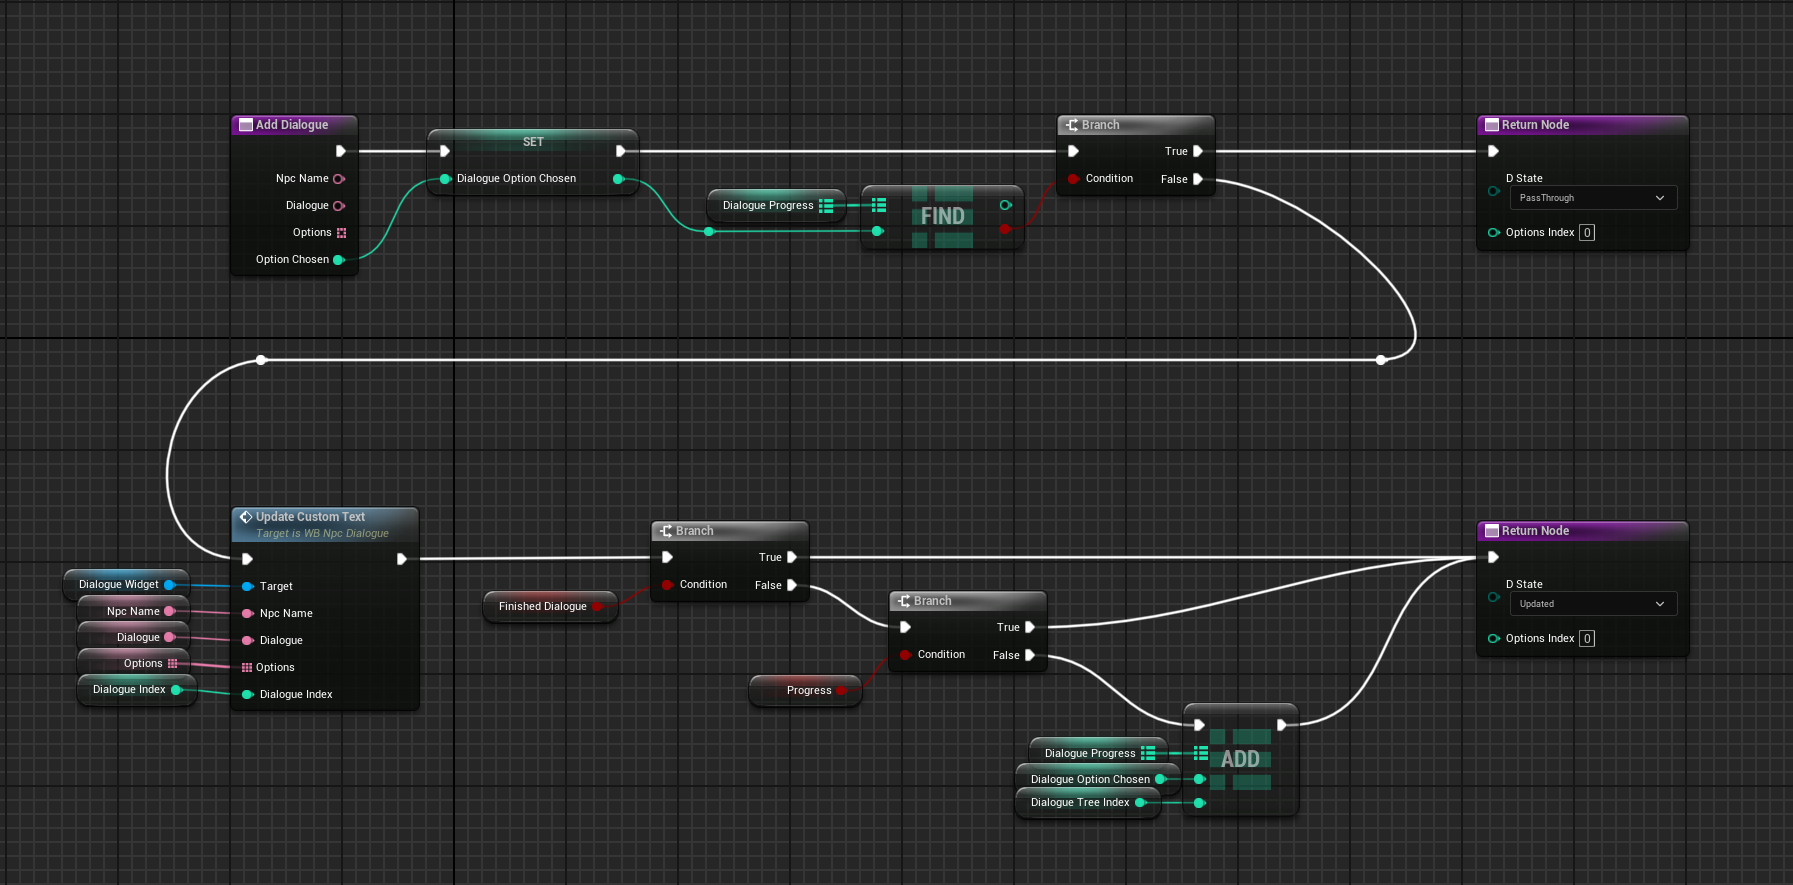
As shown in the image, the Battle Manager’s core logic is based on an enum that defines the different phases of combat (such as the player’s attack phase, the enemy’s attack phase, dialogue sequences and so on).
Whenever one of these phases concludes, the current enum state is updated, and the HandleStates function is called again.
These functions also manage HUD and the heart container box, which expands or contracts depending on the combat phase.
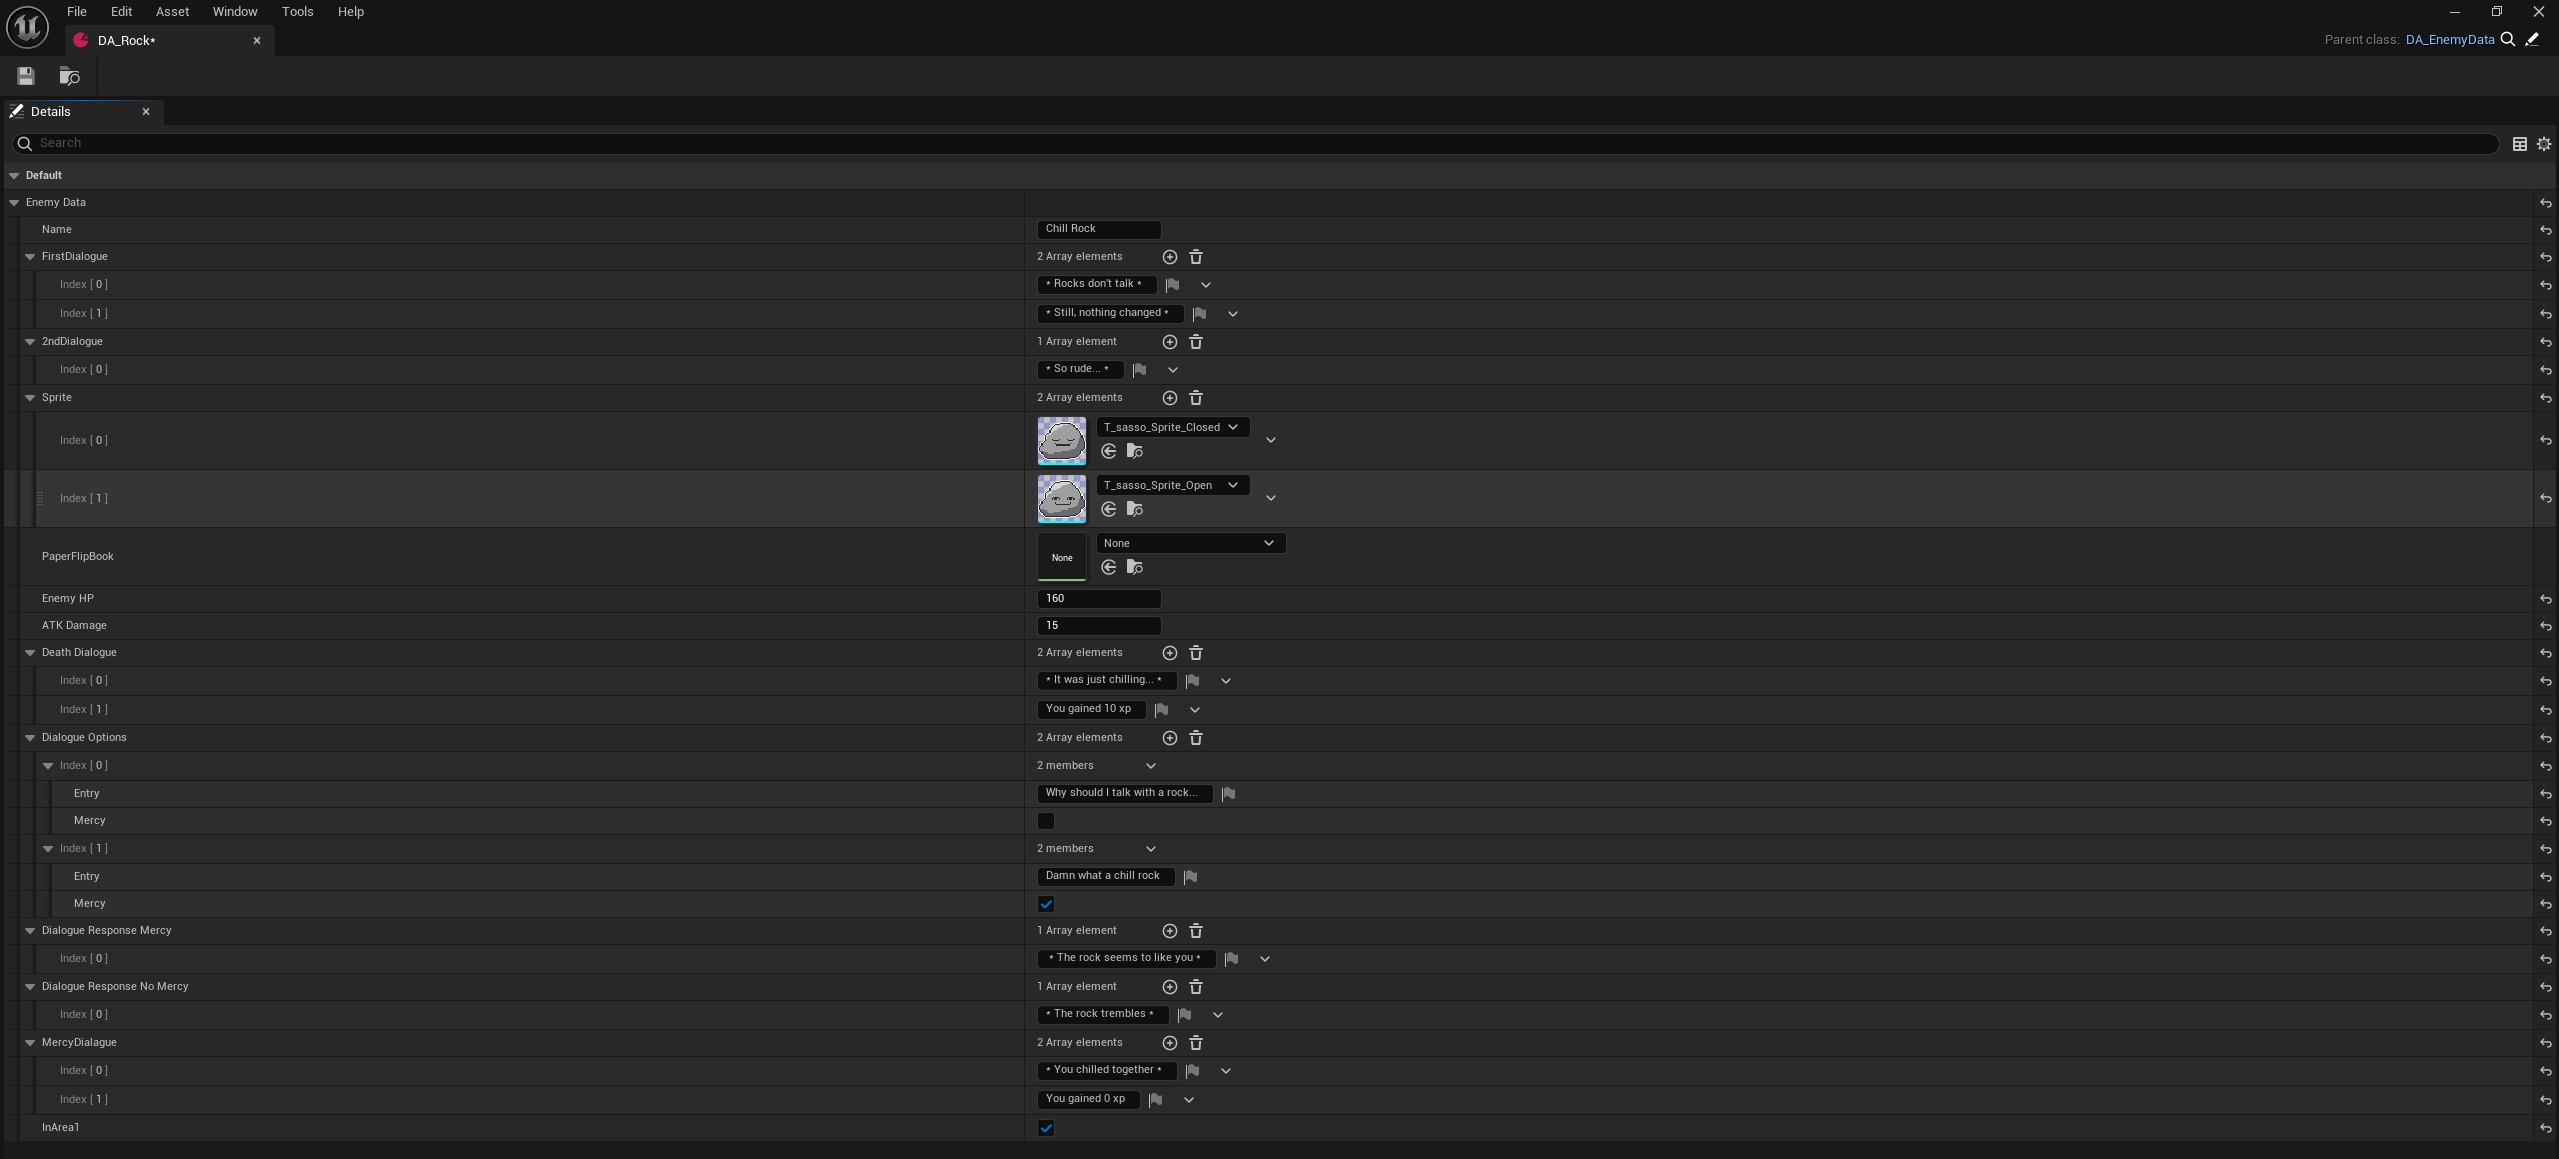
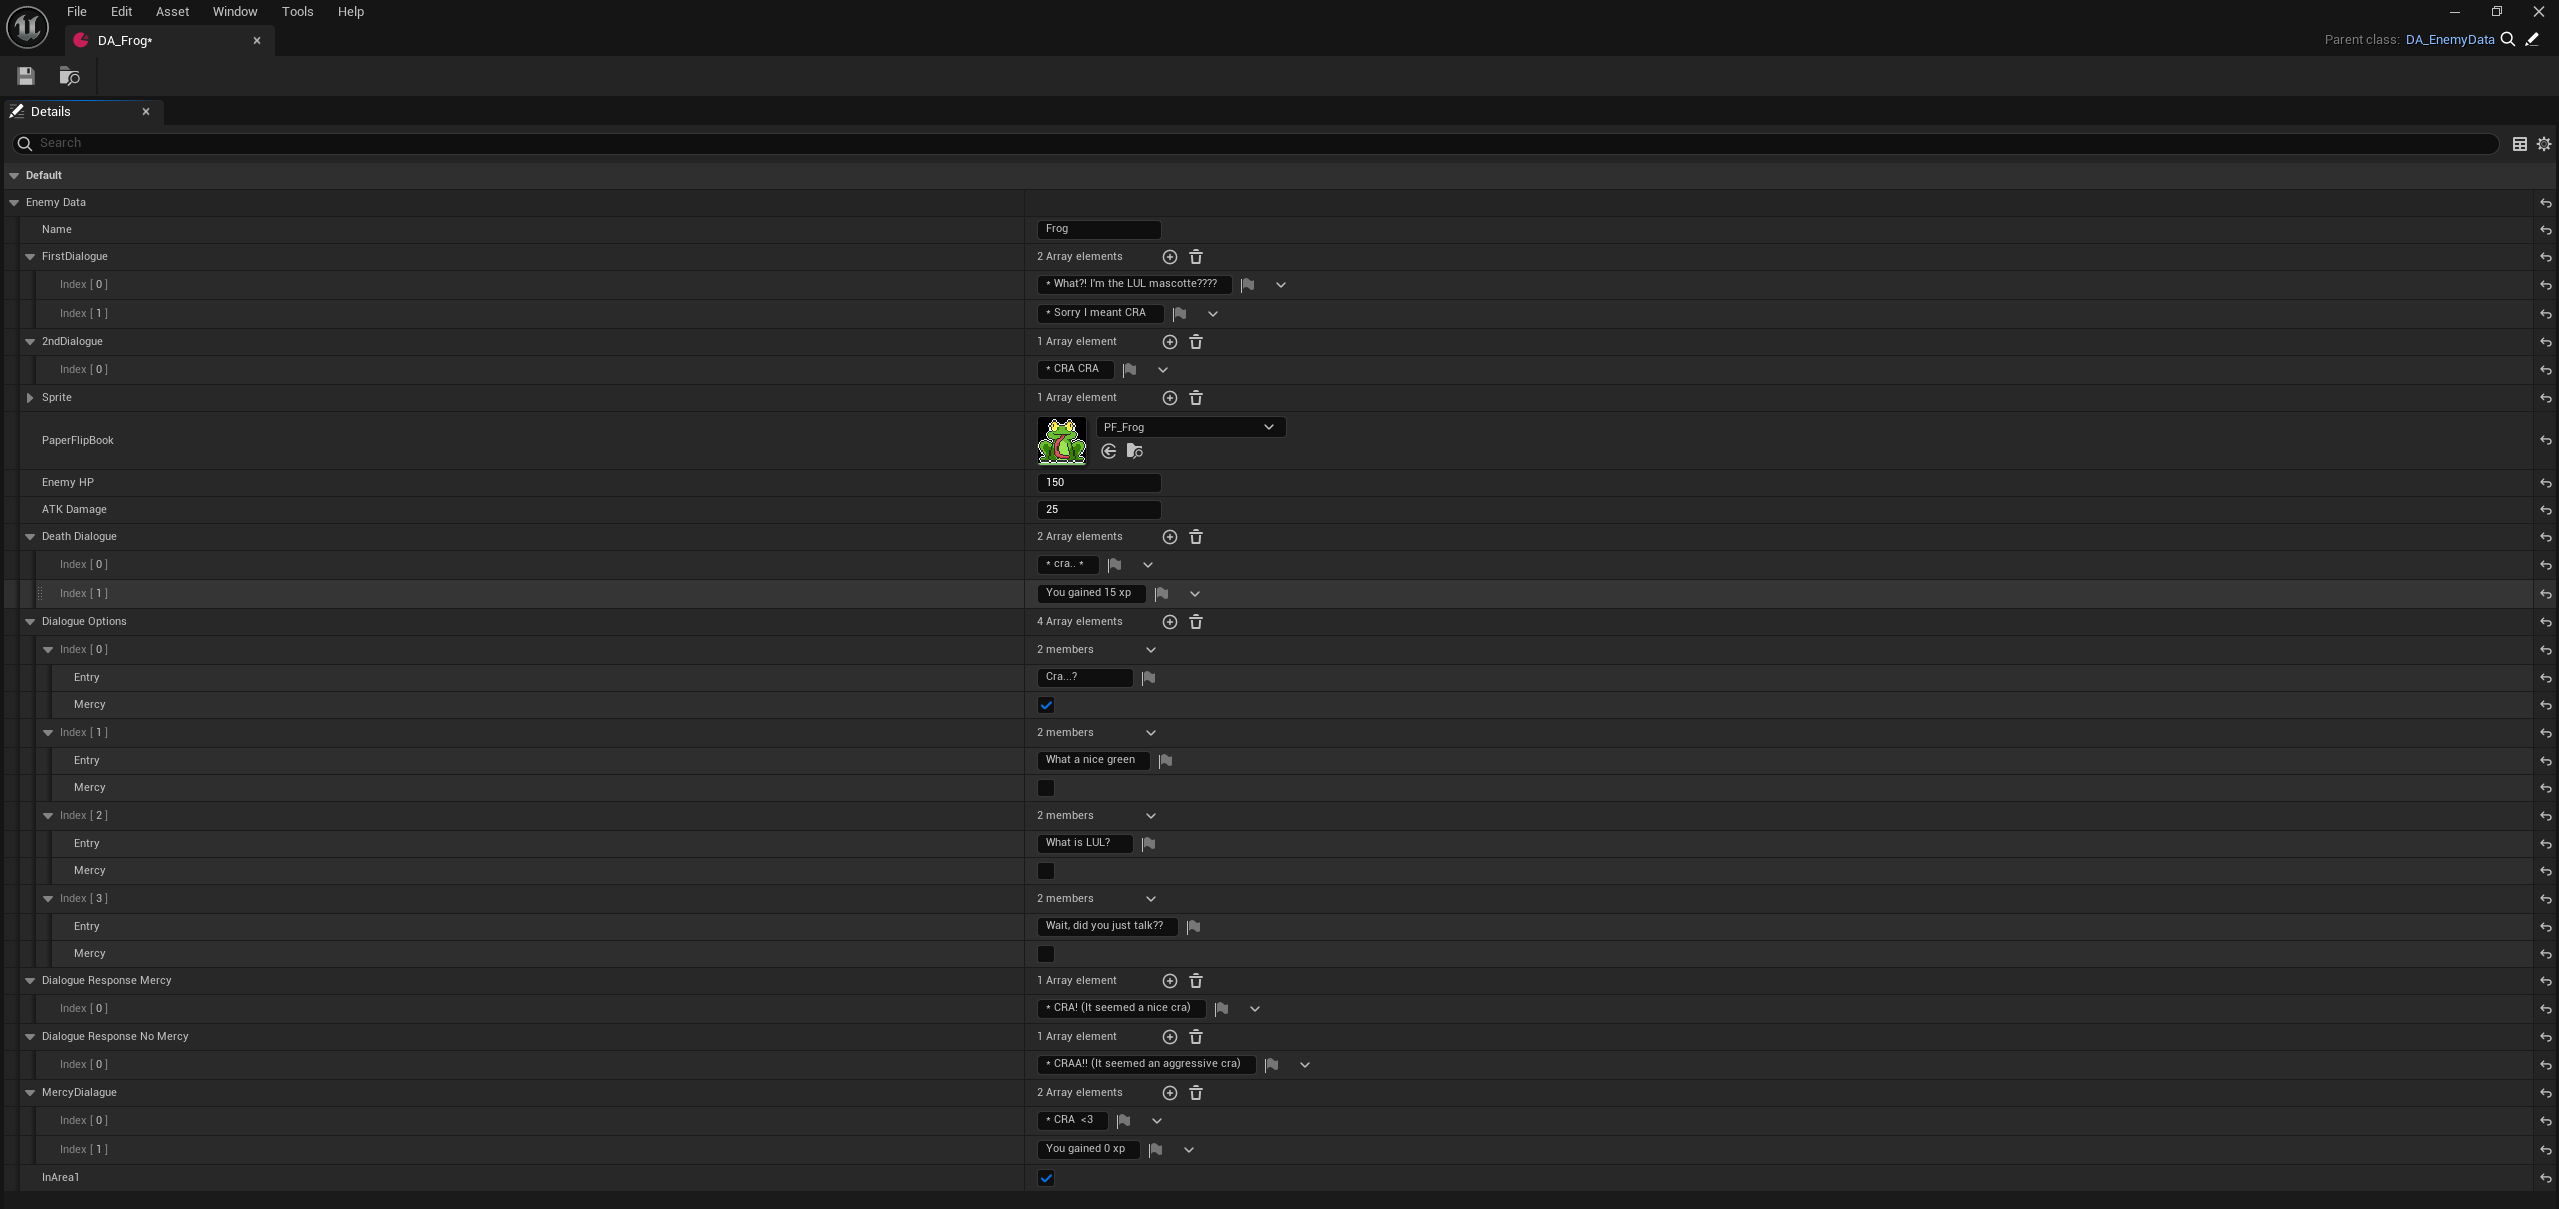
Rock Enemy Data Asset
Start battle function
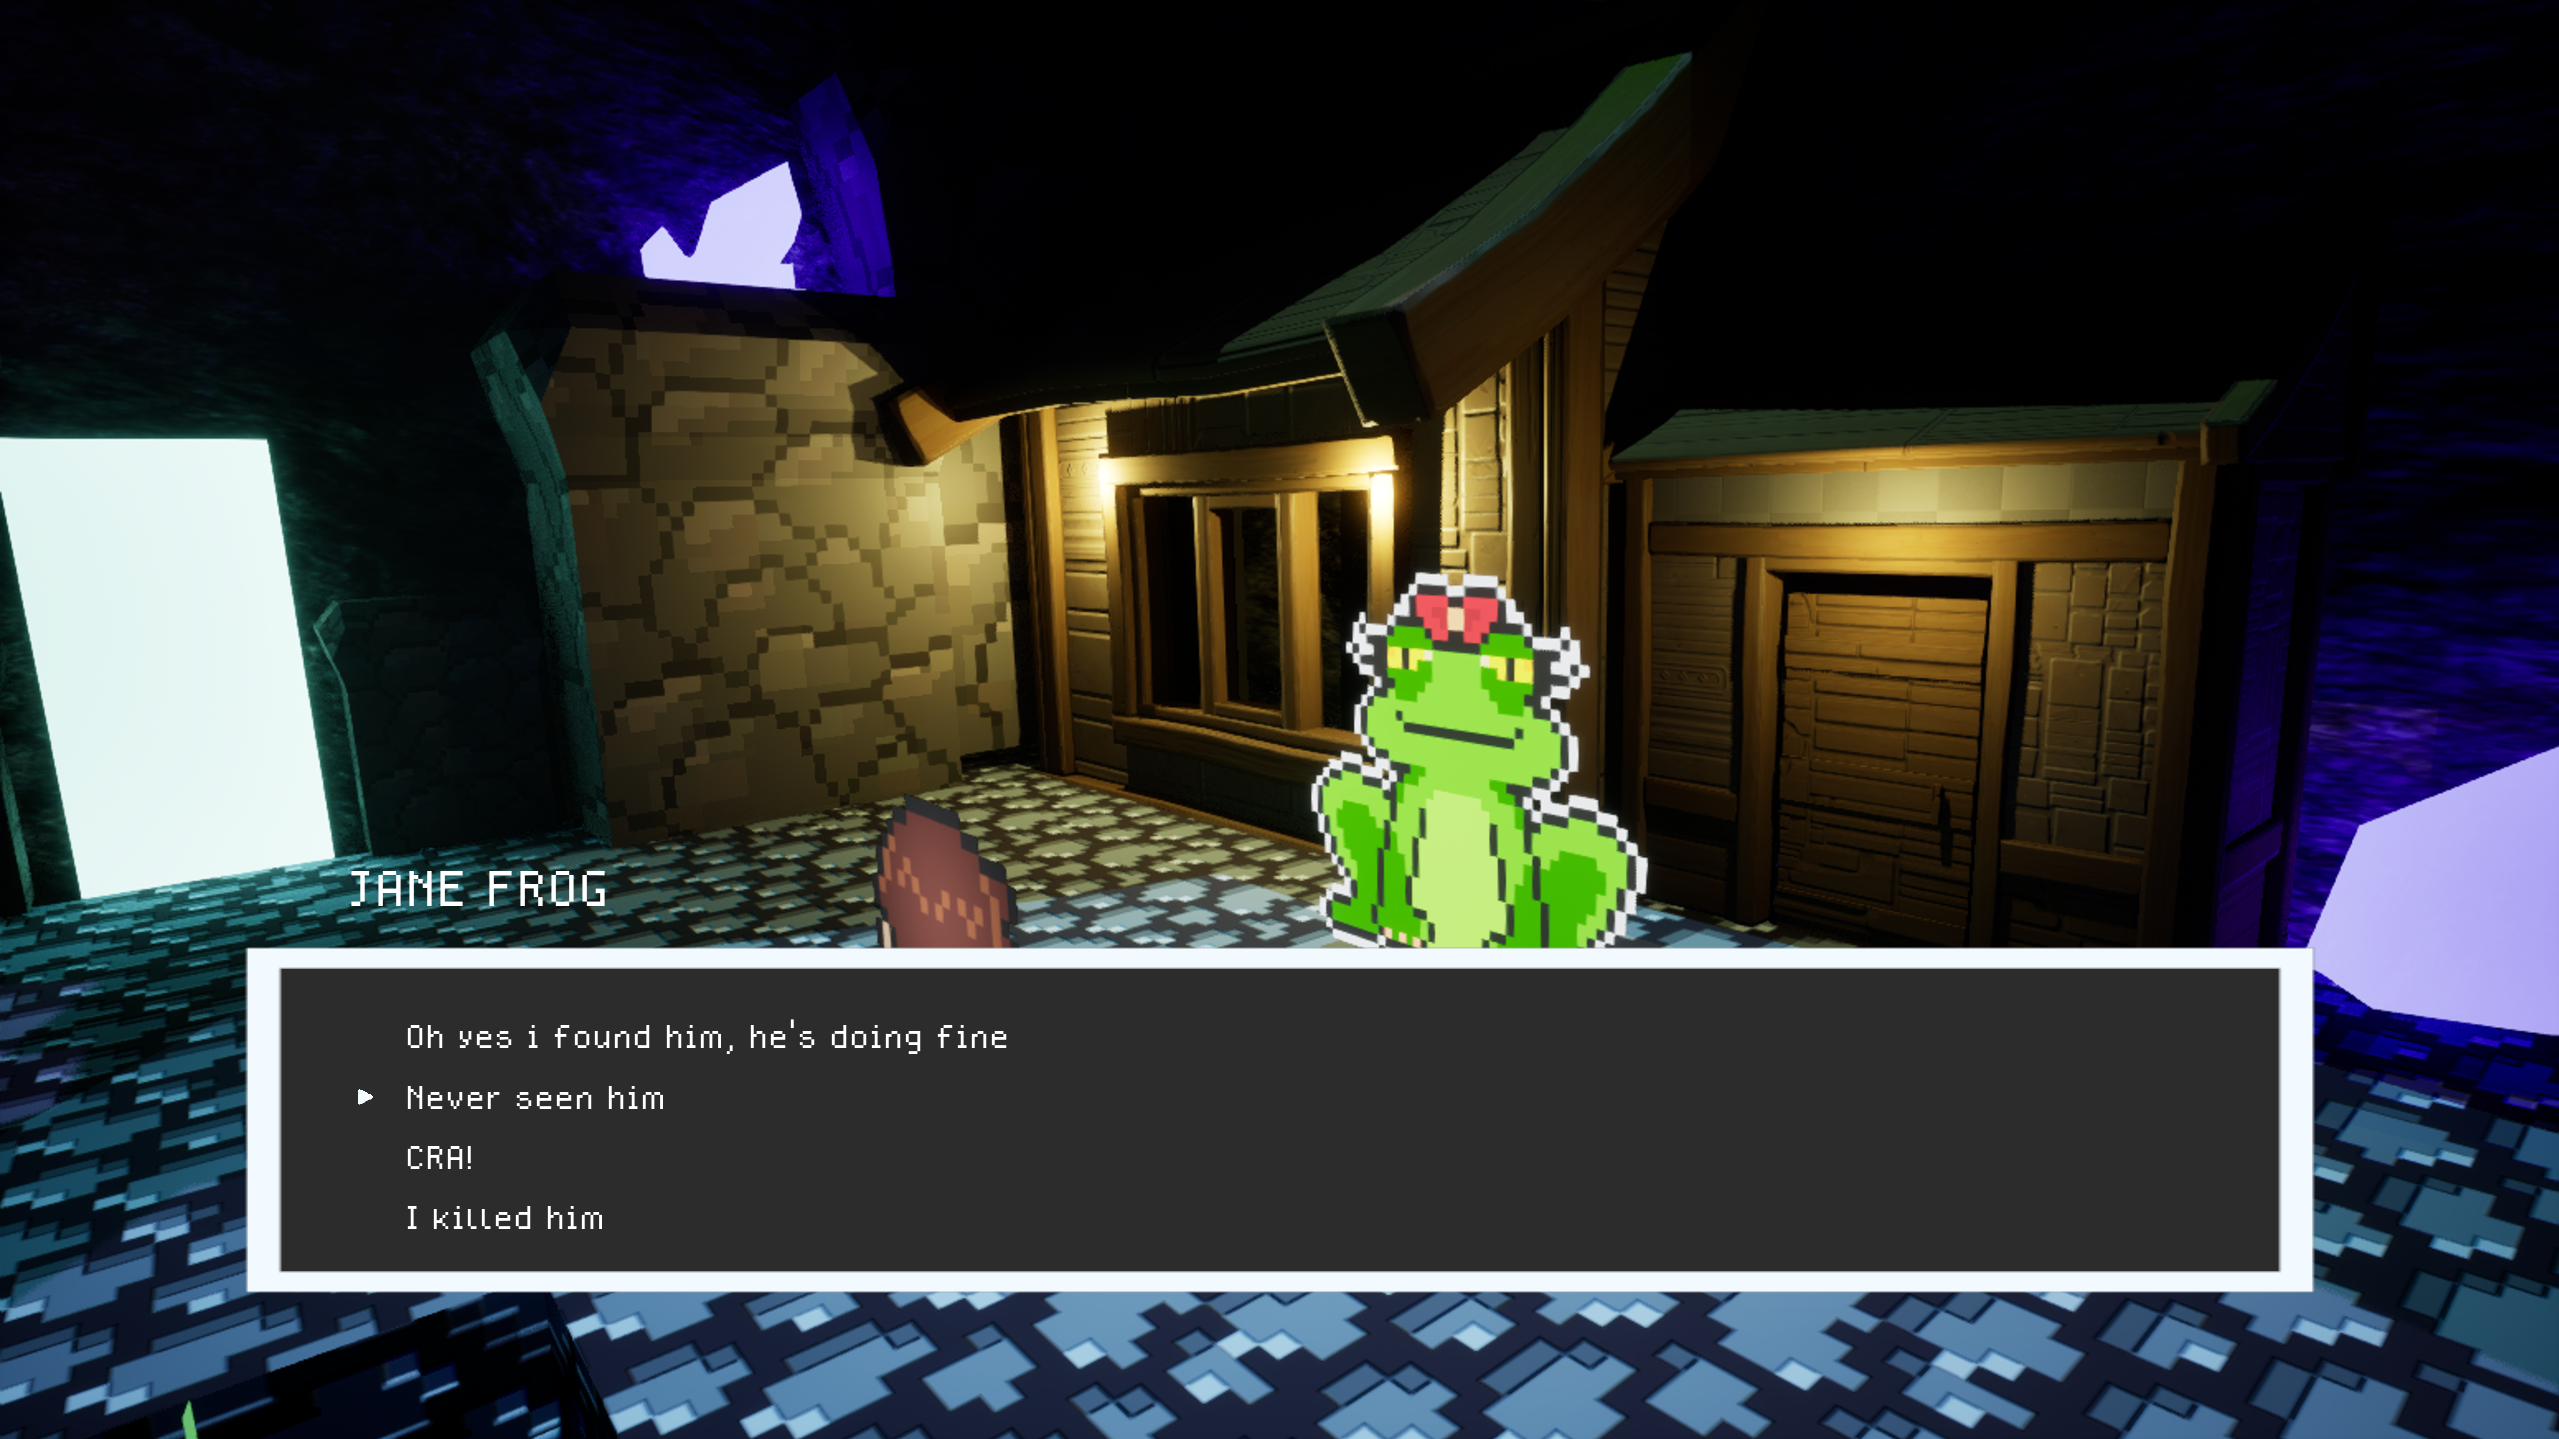
To achieve a bit of modularity in enemy creation, I used a reusable data asset that allowed the designer to select all dialogue text, enemy stats, which sprites and flipbooks to use, and also which dialogue option would enable the Mercy outcome of the battle.
The Battle Manager in the corresponding area receives these enemy Data Assets as parameters.
void UProjectileSpawnerComponent::FallingRocks(float LineLength, int32 Count, float Duration)
{
	if (!ProjectileClass || Count <= 0 || Duration <= 0.0f) return;

	FVector Origin = GetOwner()->GetActorLocation();
	UWorld* World = GetWorld();
	float LastOffset = LineLength;

	for (int32 i = 0; i < Count; ++i) {
		float Delay = FMath::FRandRange(0.0f, Duration);

		FTimerHandle TimerHandle;
		World->GetTimerManager().SetTimer(TimerHandle, [this, Origin, LineLength, &LastOffset]() {


			float Offset = FMath::FRandRange(-LineLength / 2.0f, LineLength / 2.0f);
			if (LastOffset <= Offset + 20.0f && LastOffset >= Offset - 20.0f) {
				if (LastOffset >= 0)
                {
                    Offset -= 30.0f;
                }
                else
                {
                    Offset += 30.0f
                }
			}
			LastOffset = Offset;
			FVector SpawnLocation = Origin + FVector(0.0f, Offset, 0.0f);
			FVector Direction = FVector(-1.0f, 0.0f, 0.0f);

			FRotator SpawnRotation = Direction.Rotation();
			FActorSpawnParameters SpawnParams;

			AProjectileActor* Projectile = GetWorld()->SpawnActor(ProjectileClass, SpawnLocation, SpawnRotation, SpawnParams);
			if (Projectile) {
				Projectile->Direction = Direction;
				Projectile->SetLifeSpan(5.0f);
			}
		}, Delay, false);
	}
}

void UProjectileSpawnerComponent::FrogTongue(FVector Dir, float LineLength, int x, int y) {

	if (ProjectileClass)
    {
		FVector Origin = GetOwner()->GetActorLocation();
		FVector Direction = Dir.GetSafeNormal();
		FRotator SpawnRotation = Direction.Rotation();

		float Offset = FMath::FRandRange(-LineLength / 2.0f, LineLength / 2.0f);
		FVector SpawnLocation = Origin + FVector(x, y, 0.0f) * Offset;

		FActorSpawnParameters SpawnParams;
		AProjectileActor* Projectile = GetWorld()->SpawnActor(ProjectileClass, SpawnLocation, SpawnRotation, SpawnParams);

		if (Projectile)
        {
			Projectile->TongueAnim(Direction, SpawnLocation, TongueMaxDistance, TongueSpeed);
        }

	}

}
To handle enemy attacks, I implemented a C++ Actor Component that contained the two attack types available to our enemies. These components were assigned to the four spawners present in the combat scene.
When needed, the Battle Manager would call the attack function from one or more of these spawners.
Regarding the attacks themselves, for the falling rock mechanic I used a line whose length could be defined by the designer.
Projectiles were spawned randomly along this line. To manage overlaps between projectiles, I performed a check to see whether any newly spawned projectile was too close to a previous one, if so, its position was adjusted.
The player’s attack system was implemented using two blueprints: one controlling the moving bar and another managing the bar background.
When the bar appears, the player's input is enabled to stop it with precise timing.
Upon stopping, a check on the damage background is performed to see whether the bar intersects any hitboxes.
Each hitbox has an associated damage multiplier, 2× for the center (perfect hit) and 0.5× for the outer zones, and the final damage is computed as a random value within the appropriate range based on the multiplier.